You have two options: you can have a professional create the floor plan for your house for sale or you can create it yourself. Where do you start?
If you are going to sell your home and are thinking of providing the house plans to provide additional information about the property, you have two options: you can ask a professional to create the plans, a service that can cost you between 60 and 400 euros, or you can do them yourself.
Thanks to the Internet, it is possible to create practically professional plans for free on our own, and it is not very complicated. Today, from Fotocasa, we will tell you the steps to take to make a simple and clear plan for your home.
Let’s get started…!
5 steps to Make a Floor Plan for a House
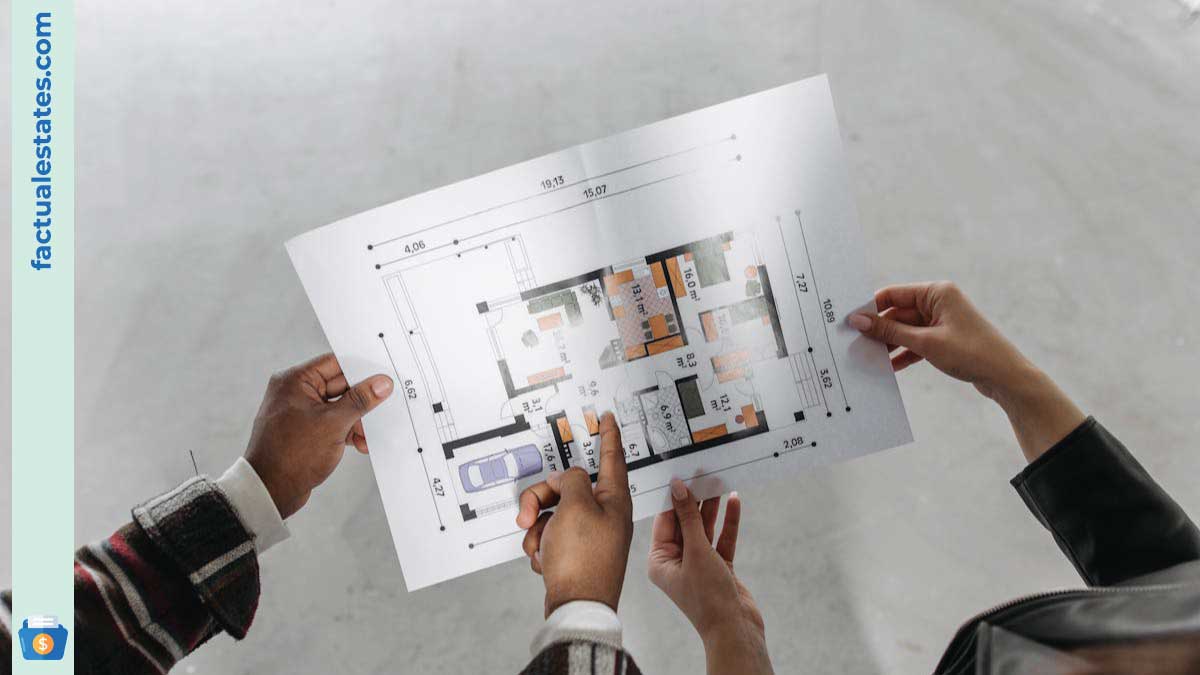
Before we begin, we want to clarify what a floor plan is. It is a scale drawing of a property that shows us the relationship between the rooms, objects and elements in a home. The floor plan view of a property is from above and allows us to easily understand the dimensions of each room or the layout of the apartment.
Take measurements of the house
Before you start drawing, you need to know the dimensions of your home (the usable square meters ). Go room by room and note the measurements between walls, the width of doors and windows, the thickness of the walls, etc. Write down all the measurements so that the plan you create is 100% true to reality.
The most common way to measure is with a tape measure, but the most comfortable and easy-to-use (and more professional) option is a laser meter. With just the push of a button, you will know the distance between one point and another.
If you are wondering whether a plan can be made by eye, without having to measure, we at Fotocasa do not recommend it, as the result will not be what you are looking for and will not be as useful as a plan made correctly.
Plan the measurements of your scale drawing
Now that you have the measurements, decide on what scale you want to put them on paper. Typically, the most popular scales for creating floor plans are between 1:50 and 1:100 . Think about the size of the apartment and the size of the document or paper you want to put the plan on.
Remember that the first number is associated with the plan measurement units and the second with the real ones, so, for example, 1:100 means that 1 centimetre of the plan is equivalent to 100 real centimetres (1 meter).
Draw the plan to scale
If you already have a clear idea of the scale you will choose for your plan, it is time to start drawing. If you prefer, you can do it on a sheet of paper using a ruler and a pencil, but it is best to use one of the many online plan design programs. There are several free tools that allow you to make basic plans that are visually clear and intuitive.
Include the necessary notes to understand the house plan
Once you have finished drawing (either by hand or using an online tool) all the rooms in the house with their respective measurements to scale, label each of the rooms, the place where the closets are located and the outdoor areas. Include the necessary notes to understand the plan: bedroom, living room, bathroom, gallery, kitchen…
Don’t overload the plan with information, as this will make it difficult to interpret. On the other hand, you will see that some tools allow you to furnish the house, add colour to the walls, etc. Remember that you are making a basic plan for your house so that future buyers understand its dimensions and the available space. The plan should be basic and simple.
Add details and symbols to the floor plan about the rooms
You should not overload the plan with information, but you should add details and elements of the home such as the location of interior doors, balcony or terrace doors, windows or where appliances, the shower or kitchen sink are located.
There are often symbol templates in floor plan creation tools, so it’s just a matter of placing them in the exact area where they are in real size. Make sure that the size of these elements is appropriate for the size of the rooms. Also, you should indicate in which direction the doors swing so that the buyer can visualize the space correctly.
At Fotocasa, we have an excellent team of professionals dedicated to creating relevant content for our readers. If you liked this article, we would be delighted if you published it on your website. In that case, don’t forget to mention Fotocasa as the source of the content. Thank you very much for your support.


Leave a Reply